
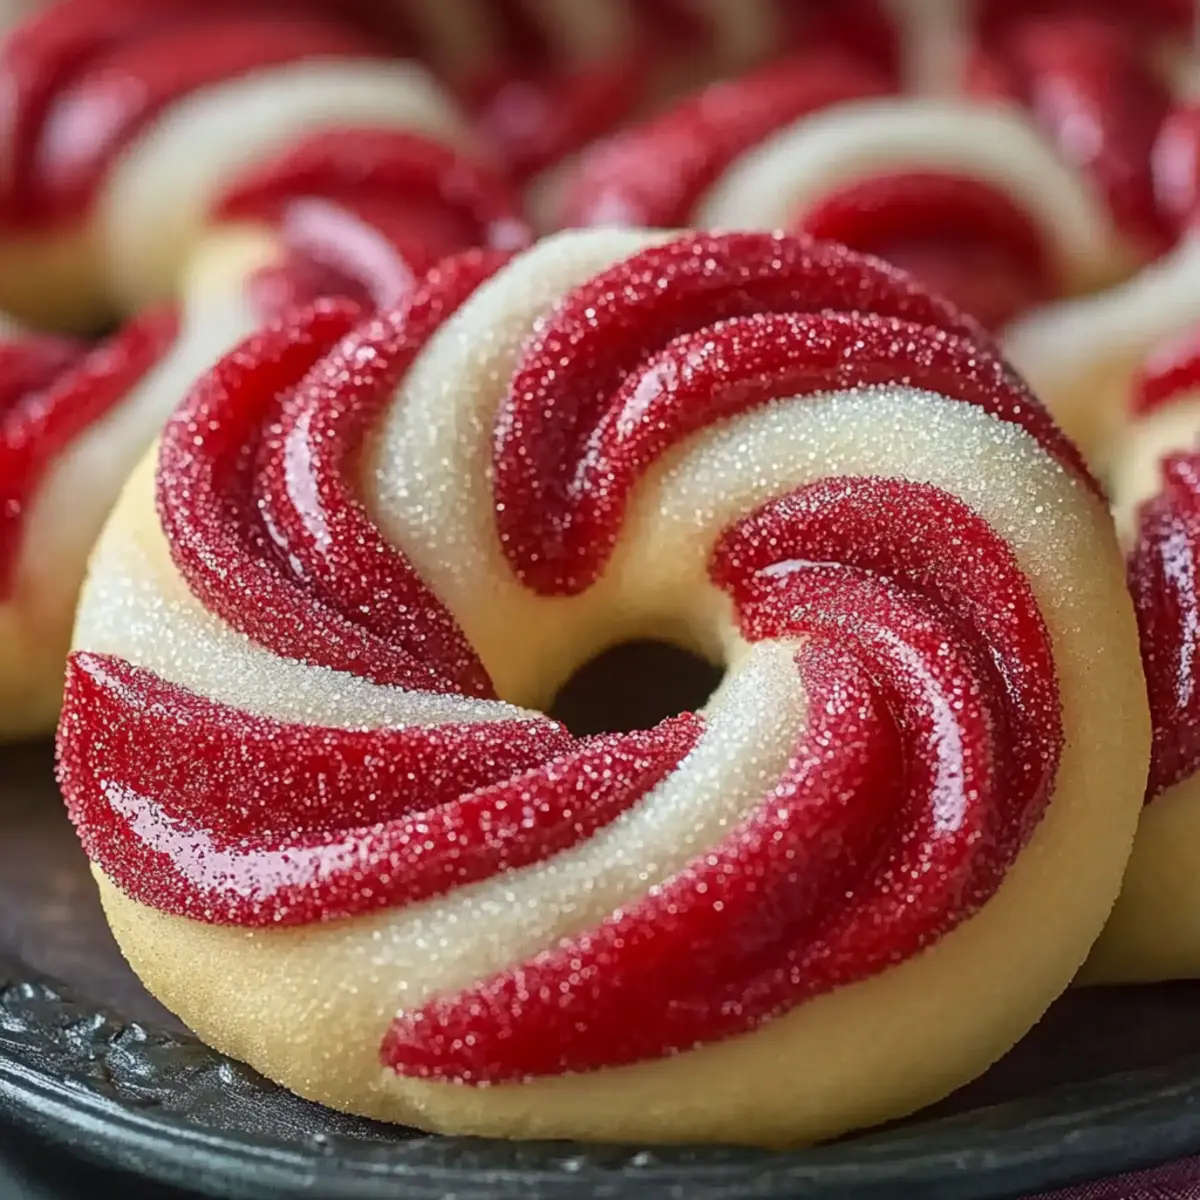
As I sipped a warm cup of cocoa, the scent of peppermint danced in the air, instantly transporting me to a cozy winter wonderland. That’s the magic of making Candy Cane Cookies, a festive treat that not only delights the senses but also fills your home with holiday cheer. With a prep time of just 30 minutes, these cookies are not only easy to whip up but also a joyous way to involve your loved ones in the kitchen. The soft and chewy texture, paired with the refreshing peppermint extract, makes them a crowd-pleaser for any gathering. Plus, they can be made ahead and frozen for those impromptu dessert cravings! Are you ready to twist your way into the holiday spirit with this delightful recipe?

Why are Candy Cane Cookies so special?
Delightful flavor: The sweet blend of vanilla and peppermint creates a refreshing taste that perfectly encapsulates the holiday spirit.
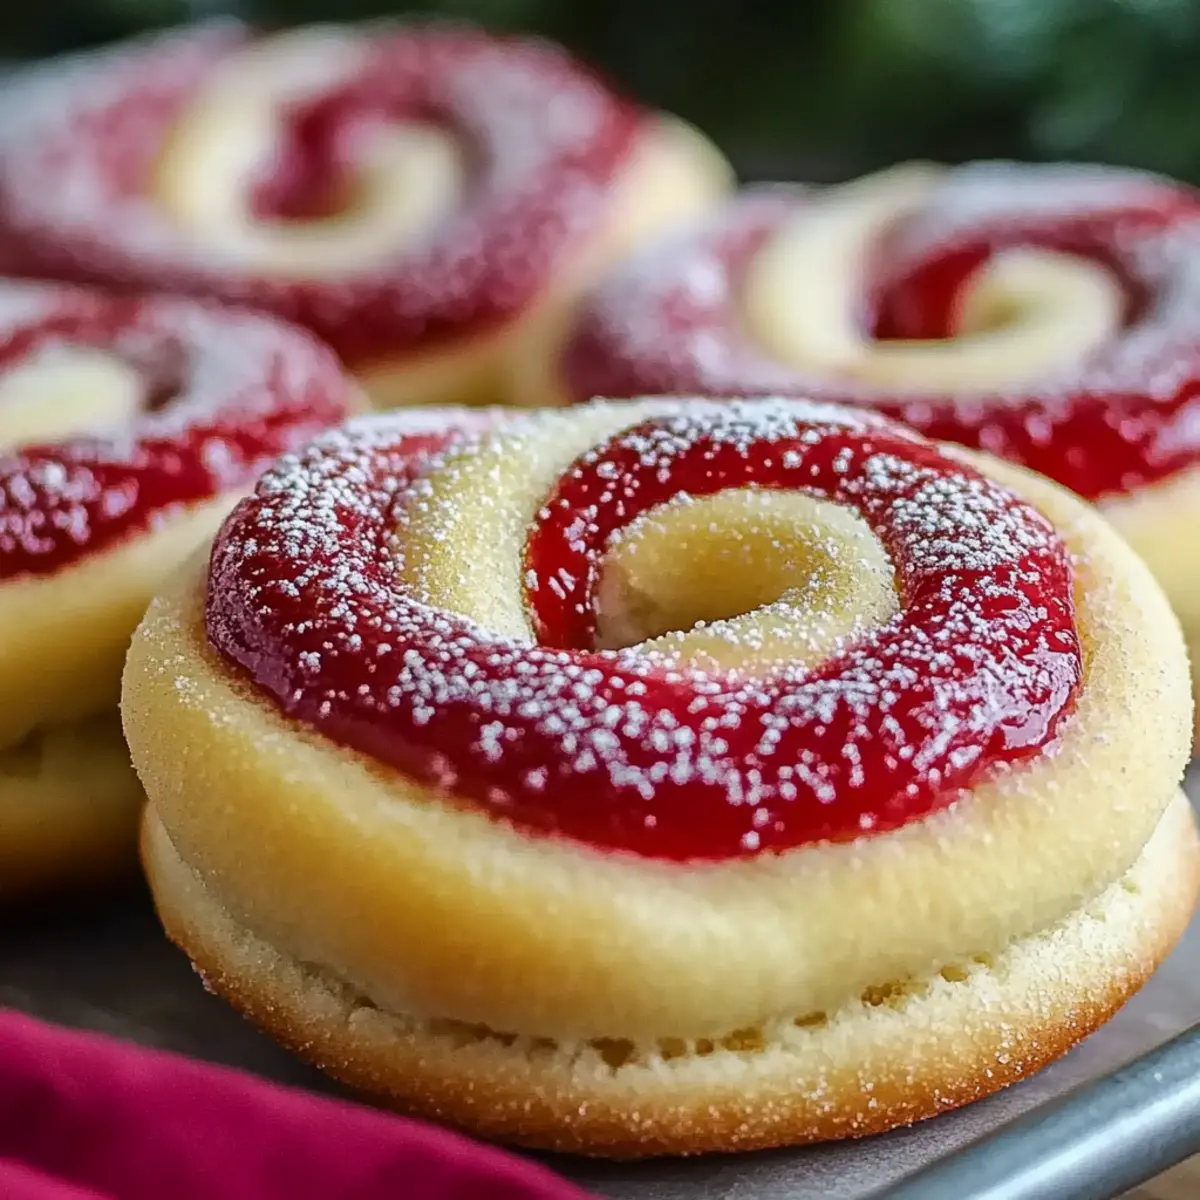
Festive appearance: These cookies’ red and white stripes add a cheerful touch to any dessert table.
Quick prep: In just 30 minutes of preparation, you can make these delightful cookies, making them perfect for spontaneous baking sessions.
Make ahead: Store them easily by freezing the dough or baked cookies, ensuring you have a sweet treat ready anytime.
Family fun: Involving loved ones in the twisting and shaping of these cookies turns baking into a joyful activity, creating lasting holiday memories.
Candy Cane Cookies Ingredients
Get ready to indulge in a festive treat!
For the Dough
- Unsalted butter – 1 cup, softened for a creamy base.
- Granulated sugar – 1 cup, to provide sweetness and enhance flavor.
- Large egg – 1, to bind the ingredients together beautifully.
- Vanilla extract – 1 teaspoon, for a warm, aromatic kick.
- Peppermint extract – 1 teaspoon, the magical essence that makes Candy Cane Cookies special.
- All-purpose flour – 2 ½ cups, the foundation of your cookie dough.
- Salt – ½ teaspoon, to balance and enhance all the flavors.
For Coloring
- Red gel food coloring – as needed, to create vibrant candy cane stripes.
For Rolling
- Granulated sugar – ¼ cup, for a sweet coating that adds a delightful crunch.
Step‑by‑Step Instructions for Candy Cane Cookies
Step 1: Preheat the Oven
Begin by preheating your oven to 350°F (175°C). This ensures that your Candy Cane Cookies will bake evenly and at the right temperature. While the oven warms up, gather all your ingredients to make the preparation smooth and enjoyable.
Step 2: Cream the Butter and Sugar
In a large mixing bowl, cream together 1 cup of softened unsalted butter and 1 cup of granulated sugar using an electric mixer on medium speed. Beat the mixture for about 3–5 minutes until it becomes light and fluffy, creating a perfect base for your cookies.
Step 3: Add Egg and Extracts
Next, beat in 1 large egg, along with 1 teaspoon of vanilla extract and 1 teaspoon of peppermint extract. Continue mixing until everything is well combined and the mixture is smooth, fragrant, and silky, bringing that signature peppermint aroma to your kitchen.
Step 4: Incorporate Flour and Salt
Gradually sift in 2 ½ cups of all-purpose flour and ½ teaspoon of salt. Mix on low speed until just combined, being careful not to overwork the dough. You want a soft, cohesive dough that holds together without any dry spots.
Step 5: Divide and Color the Dough
Once your dough is ready, divide it into two equal halves. Color one half with red gel food coloring, kneading the dough to achieve a vibrant hue. This adds that festive candy cane appearance to your cookies, making them visually as delightful as they are delicious.
Step 6: Chill the Dough
Wrap both halves of the dough in plastic wrap and refrigerate for at least 30 minutes. Chilling the dough makes it easier to handle and ensures that the cookies hold their shape during baking, resulting in perfectly formed Candy Cane Cookies.
Step 7: Roll and Shape the Cookies
After chilling, take small amounts of each colored dough and roll them into ropes about 6 inches long. Twist the red and white ropes together to form candy cane shapes, which adds a lovely visual appeal to your cookies as they look festive and inviting.
Step 8: Coat with Sugar
Before baking, roll each shaped cookie in granulated sugar to create a sweet, crunchy exterior. This adds not only flavor but also a beautiful sparkle to the finished Candy Cane Cookies, enhancing their festive charm.
Step 9: Bake the Cookies
Place the shaped cookies on a lined baking sheet, spacing them about 2 inches apart. Bake in your preheated oven for 9–11 minutes, until they are set but still soft and not browned. Keep an eye on them for that lovely light glow, indicating they’re ready to come out.
Step 10: Cool and Enjoy
Once baked, remove the cookies from the oven and let them cool on the baking sheet for a few minutes. Then transfer them to a wire rack to cool completely. Enjoy the delightful essence of your homemade Candy Cane Cookies once they’re fully set, sharing them with loved ones or saving them for later.

What to Serve with Candy Cane Cookies
As you revel in the delightful aroma of Candy Cane Cookies, consider pairing them with these wonderful accompaniments that will elevate your holiday gathering.
- Hot Chocolate: A steaming cup of rich hot chocolate enhances the peppermint flavor, creating a warm and cozy experience.
- Peppermint Bark: This crunchy and creamy treat echoes the flavors of your cookies, creating a delightful candy duo.
- Vanilla Ice Cream: A scoop of smooth vanilla ice cream offers a luscious contrast to the chewy texture of the cookies.
- Fruit Salad: Fresh fruits add a refreshing, fruity brightness that balances the sweetness of the cookies.
- Spiced Apple Cider: The warm spices in apple cider beautifully complement the peppermint, adding a festive touch to your gathering.
- Christmas Punch: A sparkling fruit punch brings a fizzy burst to your holiday table, perfect for refreshing sips between bites of cookies.
- Cheese Platter: A selection of mild cheeses provides a savory balance, creating a delightful contrast to the sweetness of your Candy Cane Cookies. Pair with some dried fruits for added flavor.
- Chocolate Fudge: Rich and velvety chocolate fudge pairs wonderfully with the cookies, making every bite feel indulgent and festive.
Candy Cane Cookies Variations & Substitutions
Feel free to get creative and make these festive cookies your own with some delightful variations!
-
Gluten-Free: Use a 1:1 gluten-free flour blend to replace all-purpose flour for a gluten-free version while keeping the same great taste.
-
Chocolate Peppermint: Add ½ cup of cocoa powder to the dough for a chocolate twist. This pairs beautifully with the peppermint extract for a rich flavor.
-
Mint Extract: Swap peppermint extract for spearmint extract for a milder minty flavor, perfect for a different holiday vibe.
-
Holiday Sprinkles: Instead of rolling in sugar, coat the cookies in festive sprinkles for an extra pop of color and crunch.
-
Coconut Flakes: Roll the formed cookies in shredded coconut before baking for a tropical flair that complements the peppermint nicely.
-
Nutty Touch: Add ½ cup of chopped pecans or walnuts to the dough for added texture and a nutty flavor that enhances the overall taste experience.
-
Heat It Up: For a spicy kick, add ¼ teaspoon of cayenne pepper or chili powder to the dough. This unexpected warmth contrasts beautifully with the sweetness.
-
Frosted Delight: Top cooled cookies with a simple glaze made from powdered sugar and milk, drizzling it over for an extra sweet finish.
Storage Tips for Candy Cane Cookies
Room Temperature: Store cookies in an airtight container at room temperature for up to 1 week to keep them fresh and chewy.
Fridge: If you prefer, you can refrigerate the cookies for up to 2 weeks; just ensure they’re well sealed to prevent drying out.
Freezer: To savor these delightful Candy Cane Cookies later, freeze them in a single layer on a baking sheet before transferring to a freezer-safe bag. They’ll last up to 3 months.
Reheating: For cozy enjoyment, reheat frozen cookies in the oven at 350°F (175°C) for about 5 minutes, bringing back their soft, chewy texture.
Expert Tips for Candy Cane Cookies
Perfect Shape: Use cold dough: Keeping the dough chilled helps maintain its shape. If it becomes too soft while working, simply refrigerate again.
Coloring Done Right: Gel food coloring: Use gel rather than liquid for vibrant colors without adding excess moisture to the dough.
Avoid Overbaking: Watch the timer: Bake just until set but not browned; this ensures cookies remain soft and chewy.
Smooth Mixing: Don’t over-mix: Once you add flour, mix until just combined to prevent tough cookies.
Storage Wisely: Freeze for convenience: These Candy Cane Cookies can be frozen for up to 3 months, perfect for holiday gifting or last-minute gatherings.
Make Ahead Options
These Candy Cane Cookies are perfect for busy home cooks looking to save time without sacrificing flavor! You can prepare the dough ahead of time and store it in the refrigerator for up to 3 days—just wrap each color in plastic wrap to keep them fresh and prevent drying. Alternatively, if you want to prep even further, shape the cookies and freeze them for up to 3 months. To finish the cookies, simply bake them from frozen, adding a minute or two to the baking time for that warm, freshly baked taste. With these make-ahead options, you’ll have delicious holiday treats ready to impress your family and friends with minimal effort!
Candy Cane Cookies Recipe FAQs
What should I look for when selecting peppermint extract?
Absolutely! When choosing peppermint extract, look for a pure extract without artificial flavors or additives for the best taste. Opt for brands that use natural ingredients to ensure that lovely peppermint flavor shines through in your Candy Cane Cookies.
How should I store leftover cookies and how long will they last?
To keep your delicious Candy Cane Cookies fresh, store them in an airtight container at room temperature for up to 1 week. If you want to prolong their shelf life, refrigerate them for up to 2 weeks. Just be sure they’re tightly sealed to prevent any moisture from making them dry.
Can I freeze the cookie dough, and how do I do it?
Very! You can freeze the unbaked dough for up to 3 months. Here’s how: Shape the cookie dough into a disc or log, wrap it tightly in plastic wrap, then place it in a freezer-safe bag. When you’re ready to bake, simply thaw the dough in the refrigerator overnight, then follow your usual steps to roll and shape the cookies.
What should I do if my cookies spread too much during baking?
If your Candy Cane Cookies spread more than expected, it could be due to warm dough. Ensure your dough is well chilled before shaping, and try popping it back in the fridge for about 15 minutes before baking. Also, make sure you’re measuring your flour correctly; use a spoon to fluff it up before spooning it into your measuring cup to avoid too much flour, which could result in thin cookies.
Are there any dietary considerations I should be aware of?
Definitely! For those with allergies, note that this recipe contains gluten and dairy. If you need a gluten-free option, you can substitute the all-purpose flour with a 1:1 gluten-free flour blend. For a dairy-free version, use a non-dairy butter substitute. Always check the labels on your extracts and food coloring to ensure they’re suitable for your dietary needs.
Can I use other colors instead of red for these cookies?
The more the merrier! While red gel food coloring is traditional for a festive look, you can get creative with colors. Using blue or green can give you a fun twist for non-traditional holidays or birthdays. Just remember that vibrant gel food coloring will yield the best results without compromising your dough’s consistency.
Indulgent Candy Cane Cookies for a Sweet Holiday Treat
Ingredients
Equipment
Method
- Preheat your oven to 350°F (175°C).
- Cream together 1 cup of softened unsalted butter and 1 cup of granulated sugar using an electric mixer on medium speed for 3–5 minutes until light and fluffy.
- Beat in 1 large egg, 1 teaspoon of vanilla extract, and 1 teaspoon of peppermint extract until smooth.
- Gradually sift in 2 ½ cups of all-purpose flour and ½ teaspoon of salt, mixing on low speed until just combined.
- Divide the dough into two halves and color one half with red gel food coloring.
- Wrap both halves in plastic wrap and refrigerate for at least 30 minutes.
- Roll small amounts of each colored dough into 6-inch ropes and twist them together.
- Roll each shaped cookie in granulated sugar before baking.
- Bake in the preheated oven for 9–11 minutes until set but still soft.
- Cool on the baking sheet for a few minutes, then transfer to a wire rack to cool completely.
Leave a Reply